Docs
Virtual Sound Stage v2.0.3
Table of Contents
1.User Interface
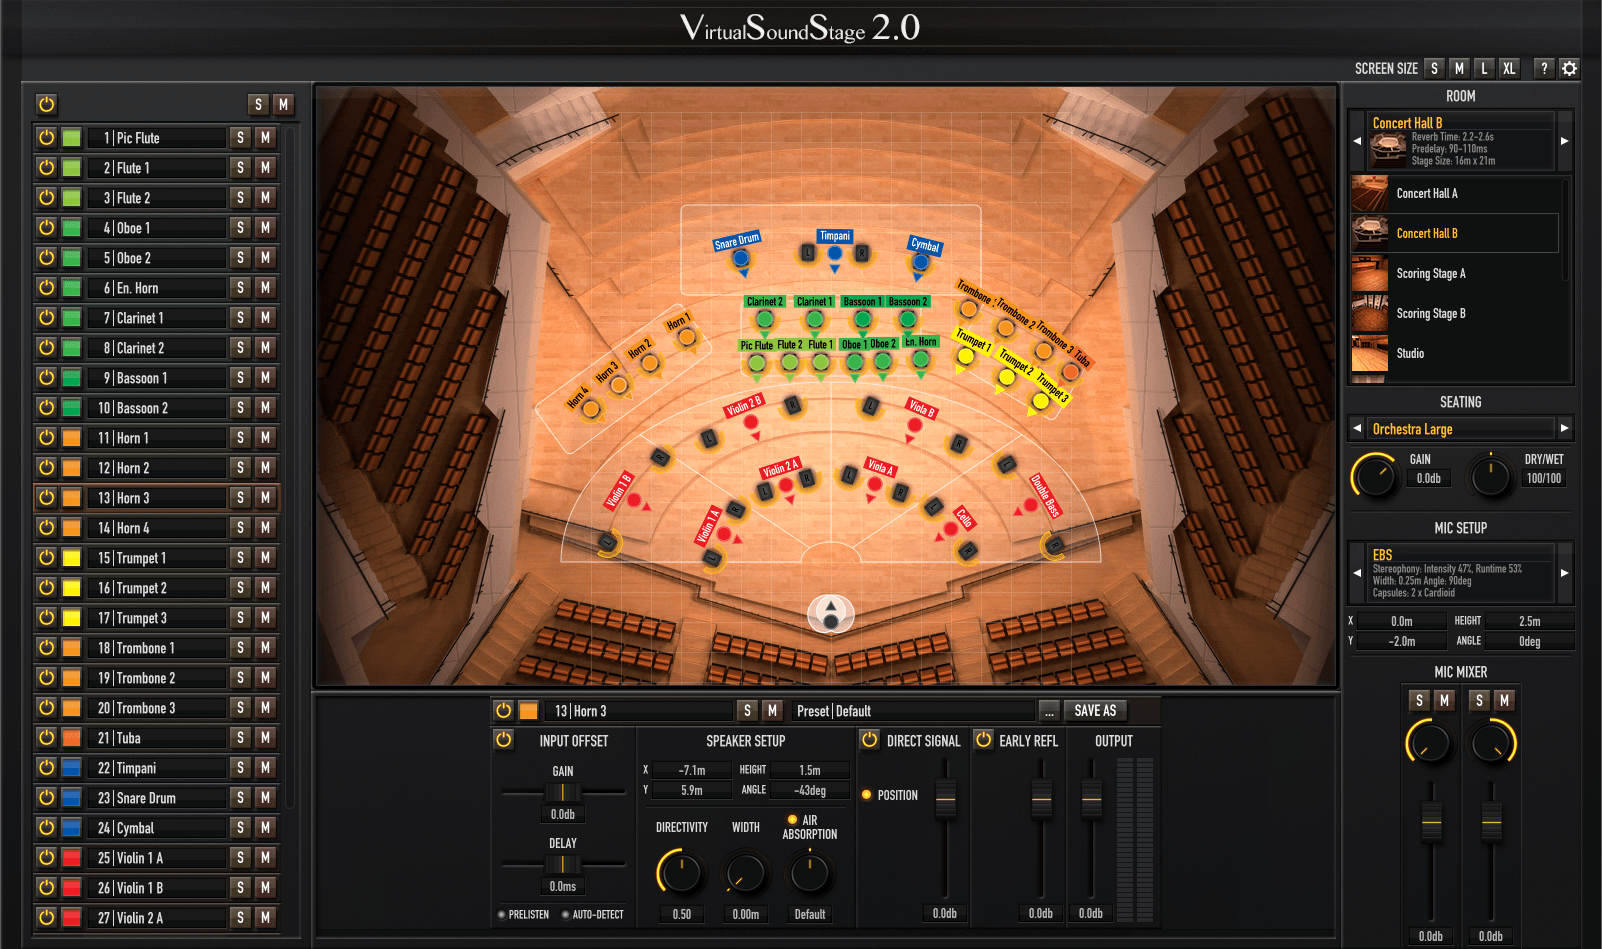
The Virtual Sound Stage plug-in window will show you a complete list of all the plug-in instances currently loaded in your DAW project, so you can quickly make adjustments without having to open each instance individually.
1.1Toolbar
Screen Size
Resize the user interface to fit your screen size.
Help
A quick link to this online documentation.
Preferences
Opens the preferences panel, where you can check your version and license.
1.2Group Selection
Group
Select the group to be displayed on the stage. Active groups that contain instances are displayed in white.
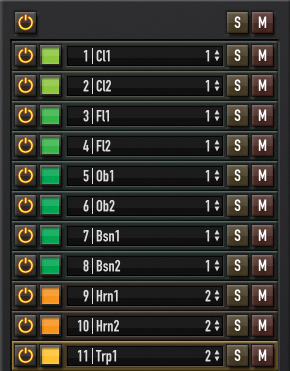
1.3Instance List
A list of all instances of VSS in your project. You can change their order by simply dragging and dropping a row.
Global Controls
Global bypass, solo and mute affecting all instances.
Bypass, Solo & Mute
For quick A/B comparisons.
Group Selector
Assign the instance to one of the eight available groups
Color Selector
Assign a color to your instruments.
Name Label
It's recommended to name your instances immediately so they are always in sync with the track names in your DAW.
1.4Input Offset
If your input signal is off to the side you can use the Input Offset to compensate for interchannel level and time differences and bring your source material back to the center before it's processed by VSS.
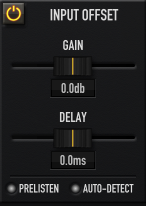
Gain
Controls the interchannel gain offset that's applied to the input signal (up to 20dB).
Delay
Controls the interchannel delay offset that's applied to the input signal (up to 15ms).
Pre-Listen
When active, you can listen to the input signal as it leaves the input offset section without any further positioning or reflections added. Useful while adjusting gain and delay.
Auto-Detect
Starts Input Offset Auto Detection: VSS records and analyzes a short section of the input signal and tries to set gain and delay offset automatically. Good starting point but always double-check by ear.
1.5Speaker Setup
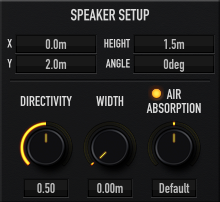
Directivity
Controls the Directivity of the virtual speakers. A directivity of 0 emits equally in all directions; 1 emits only in the speaker cone direction.
Width
Controls the width of the virtual speaker setup. There's a link between left speaker & left microphone and right speaker & right microphone to avoid phasing. Double-click the arrow in the stage view to quickly direct the sound to the main microphone.
Air Absorption
Emulates air absorption effects. Depending on setting and distance this can damp or boost high frequencies. Use higher absorption for very close-recorded signals or negative values to restore lost highs for distant recordings.
1.6Level Controls
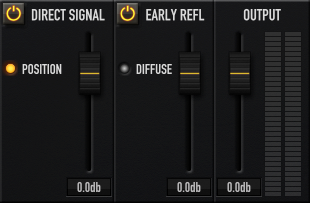
Direct Signal
Controls the level of the direct (dry) signal.
Position
If turned off the direct signal won't be touched by Virtual Sound Stage. This can be useful if you only want to add some ER's to a track without changing its stereo image.
Early Reflections
Controls the level of the early reflections.
Diffuse
Adds an extra diffusor effect to the early reflections. This works well on very dry or percussive sounds.
Output Gain
You can use the output gain to compensate for any gain differences between the input and output signal similar to a makeup gain control in a compressor.
1.7Global Controls
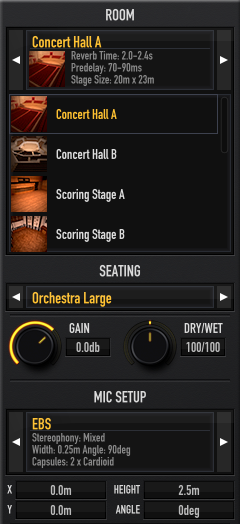
Room
A list with all available rooms and a quick starting point for your reverb tail settings.
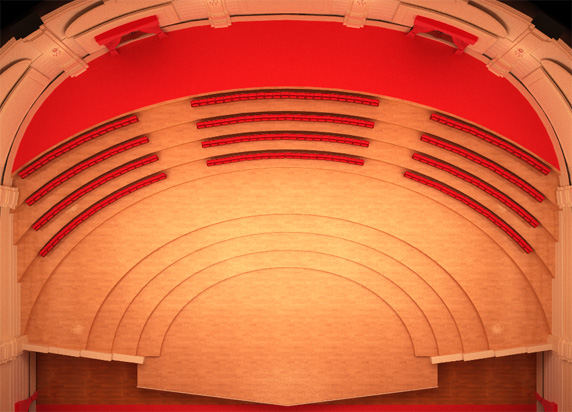
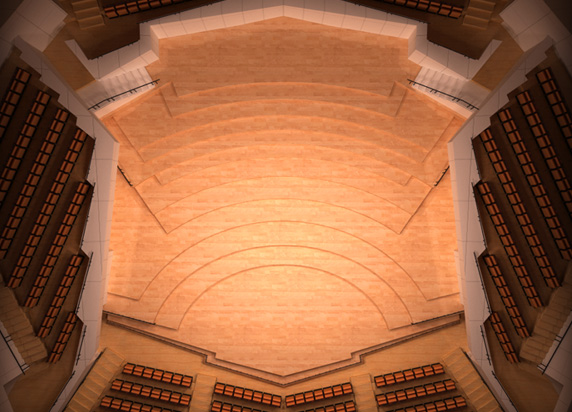
Seating
Choose a seating plan as a guide while positioning instruments.
Gain
A global gain control affecting all instances.
Dry/Wet
Changes the ratio between direct signal and early reflections in all active instances.
Microphone Setup
Choose a microphone setup from the list and set its position.
Microphone Mixer
Change the level and panning of individual microphones.
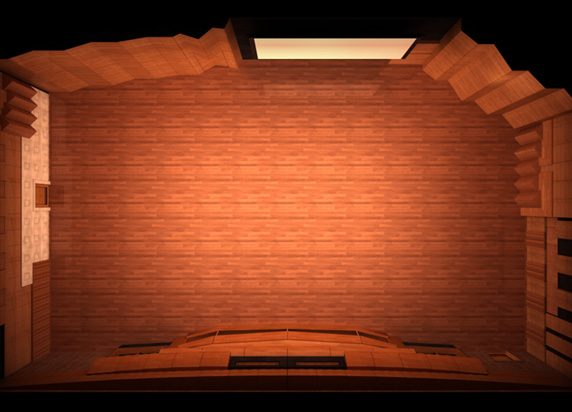
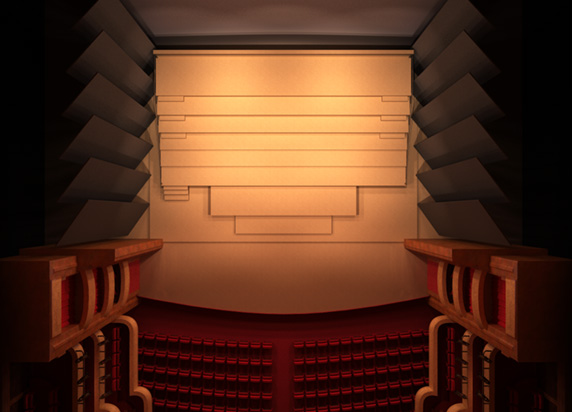
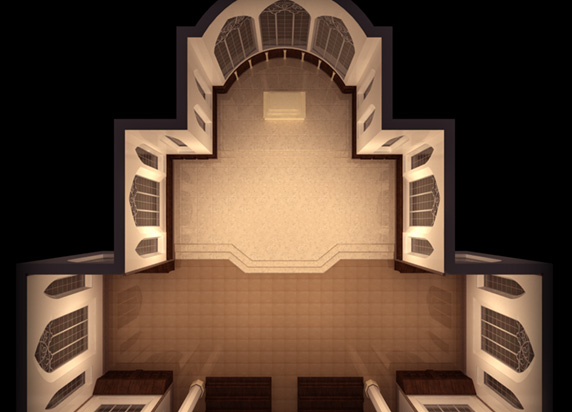
2.Rooms
Concert Hall A
Concert Hall B
Scoring Stage A
Scoring Stage B

Studio
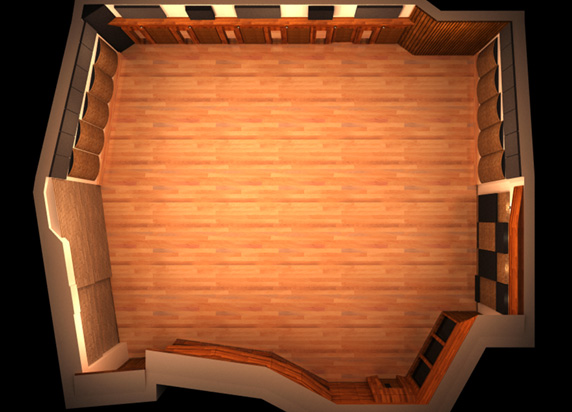
Chamber
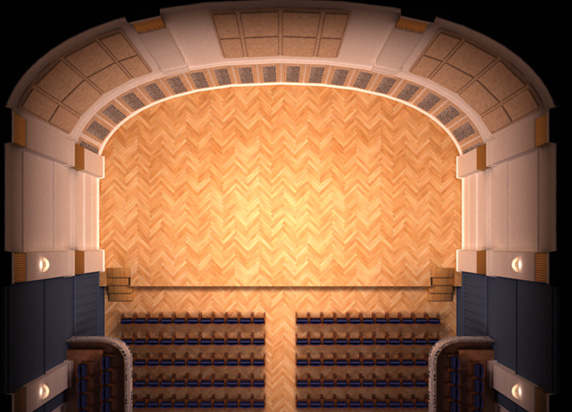
Opera
Church
Cathedral

Free Field
If you want to use Virtual Sound Stage only as a replacement for the pan controls in your DAW mixer, without adding any extra room information simply choose the Free Field from the Room Menu. This will put your sound sources in an empty space and will free up the CPU resources normally needed to generate reflections.
3.Microphone Setups
Mixed Stereophony
EBS
A compact ORTF-like setup with a very natural stereo image and good mono compatibility.
NOS
A classic spaced pair setup with a wide stereo image and good mono compatibility.
ORTF
A popular near-coincident setup with a natural stereo image and good mono compatibility.
GHS
Wide spaced pair setup with a stronger runtime stereophony component.
Runtime Stereophony
AB30
A narrow spaced pair setup with a wide stereo image and strong runtime stereophony.
AB60
A classic spaced pair setup with a very wide stereo image and strong runtime stereophony.
AB90
A wide spaced pair setup with an extremely wide stereo image and strong runtime stereophony.
AB120
An extra wide spaced pair setup with a huge stereo image and strong runtime stereophony.
AB200
An extremely wide spaced pair setup with an overwhelming stereo image and strong runtime stereophony.
Intensity Stereophony
XY60
A classic coincident setup with a focused stereo image and excellent mono compatibility.
XY90
A popular coincident setup with a wide stereo image and excellent mono compatibility.
XY120
A wide coincident setup with an extremely wide stereo image and excellent mono compatibility.
Blumlein
A classic coincident setup with a natural stereo image and excellent mono compatibility.
Others
Decca Tree
A classic Decca Tree setup with three microphones, a wide stereo image and strong runtime stereophony.
4.Basic Setup
A quick guide to get you started
4.1Installation
Download and run the installer for your operating system. This will copy the plug-in files into the default VST3/AU/AAX directories and the preset library will be installed into these folders:
- Windows:
C:/Users/*your-user-name*/Documents/parallax-audio/Presets - Mac OS:
/Users/Shared/parallax-audio/Presets
4.2Routing
You'll need an instance of Virtual Sound Stage for every instrument you want to put into the virtual room. So first of all you need to make sure that all of your instruments are available as separate stereo tracks within your DAW.
Some samplers like Kontakt by default only use one single Master Stereo Output for all patches, but most of them will also give you the possibility to switch to a setup with multiple outputs to route your instruments separately into your DAW. In general this is a much better setup, as you'll have more control over your mix directly from within your DAW and it also makes it possible to add VSS to your project without using one instance of your sampler per instrument.
This is probably also a good time to start setting up a reverb send bus with a generic reverb tail, so you can quickly add some reverb to your tracks while setting them up with VSS. For more tips on how to find the right reverb tail also see the Reverb Tail Guide section.
4.3Adding Virtual Sound Stage to a track
Now that the routing is prepared you can start adding VSS as an insert effect to one of your tracks.
I highly recommend that you name your instances instantly and also choose a rough position, so things don't get messy.
If you are using a sample library, which is included in the preset library you can go ahead and load that preset and start tweaking your sound from there. Otherwise these are the steps to go through:
1. Input Offset
Start with the Input Offset by activating the Pre-Listen function to hear the signal as it leaves the Input Offset. The goal is to get the input signal as close to the center as possible. You can give the Auto-Detection a try, which will analyze a short section of the incoming signal and try to set the input offset for you. While the gain adjustment is mostly pretty accurate, calculating the right amount of Delay Offset is very hard and for some input signals even impossible, so always double-check and adjust the settings until the signal is in center position.
2. Positioning
After you have chosen the right position and direction for your sound source, maybe using one of the seating plans, the next step is adjusting the Early Reflection Level in combination with the Reverb Send, depending on how dry the source material is.
3. Fine-tuning
Next you can tweak the sound even further with the Air Absorption, Width and Directivity controls and maybe come back to readjust the ER level afterwards.
4. Output Gain
Finally you can use the Output Gain to compensate any gain differences between input and output, similar to the makeup gain in a compressor.
4.4Room & Microphone Setup
After you have added Virtual Sound Stage to each of your tracks and adjusted the default settings to the input signal the fun part begins as you can start experimenting with different rooms and microphone setups. As you switch between setups, you can use the master Gain and Dry/Wet controls to quickly readjust the overall balance.
When you change the room remember to also switch to another reverb tail to match the Early Reflections, while using the reverb bus fader to control the overall level of the reverb tail.
5.Reverb Tail Guide
Early Reflections are the decisive factor when locating sounds within a room, but if you want to create a convincing room impression, finding the right reverb tail is also extremely important.
The good thing is, that the reverb tail is almost completely position independent, as it consists of higher order reflections. After a sound ray has been reflected by multiple surfaces, its initial starting point becomes less and less discernible. This is the reason why only using a single reverb tail for all instruments is a reasonable approximation.
5.1Use a send bus for your reverb tail
This will not only save you CPU performance, but will also give you more flexibility and control. You can set the send level individually for every instrument, while using the reverb send bus fader as a global reverb tail level control. Most reverbs also benefit from the higher input level and yield better results compared to summed up individual instances with lower input levels.
5.2Recommended Reverbs
Use either a convolution reverb, which gives you the ability to remove the ER's of the Impulse Response with a fade-in or an algorithmic reverb, which lets you lower the level of the ER's.
Convolution Reverbs with Envelope Controls:
- • Logic's Space Designer
- • Cubase's Reverence
- • AudioEase Altiverb
- • Liquidsonic Reverberate
Algorithmic Reverbs:
- • Liquidsonics Cinematic Rooms & Seventh Heaven
- • Lexicon PCM
- • Valhalla Room
- • 2C Audio Aether
5.3Pre-Delay
You can use the values from the room descriptions as a reference, but remember that the time it takes for the reverb tail to build up will vary from reverb to reverb and maybe also from patch to patch. In general you want to aim for a smooth unnoticeable transition between the Early Reflections generated by VSS and the reverb tail, avoiding any gaps, but also without masking too much of the ER's.
5.4Reverb Time
In the end this is really a matter of taste, but it plays a huge part in the overall room impression. Again there are some recommendations in the VSS user interface to give you a rough estimate of the decay times one would expect in these venues.